


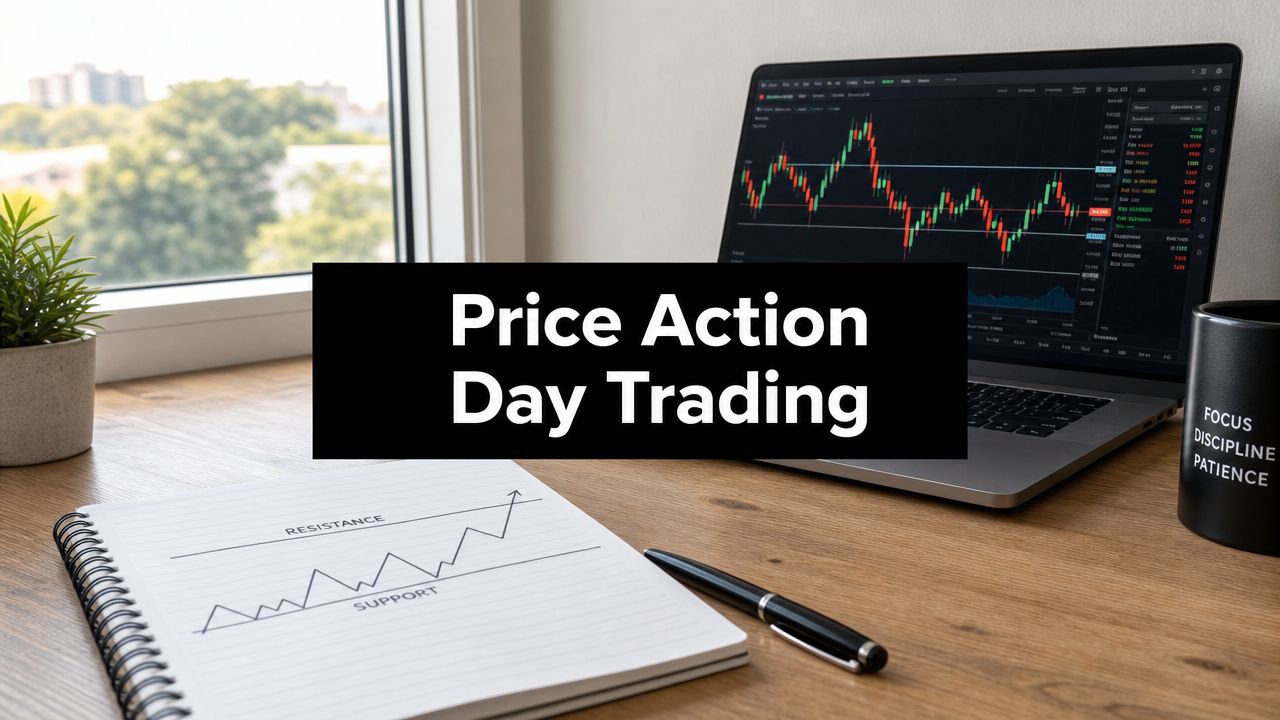
Mastering Price Action Day Trading: 2026 Strategy
You're probably staring at charts that look busy but don't feel clear. A moving average says trend. RSI says overbought. A stochastic crosses down, then price keeps climbing anyway. You take a trade late, hesitate on the exit, and then watch the clean move happen after you're out.
That cycle pushes a lot of traders toward price action day trading.
The appeal isn't mystery. It's subtraction. Instead of building decisions from layers of lagging signals, you read the structure already on the chart. You watch how price behaves around prior highs, prior lows, support, resistance, breakouts, and pullbacks. That's the raw material the market gives you every session. According to PriceAction.com's overview of price action, price action trading typically focuses on the last 3 to 6 months of price history to identify those structures.
But there's a hard truth most pattern-based guides skip. Classic candle patterns don't operate in a vacuum anymore. Electronic markets update fast. Liquidity can disappear without much warning. A breakout that looked clean a second ago can turn into a trap if you chase it at the wrong spot. In modern intraday trading, execution quality matters almost as much as the setup itself.
Trading What You See Not What You Think
A trader cleans up fast when the chart gets simpler.
The common starting point looks like this: several indicators, conflicting reads, late entries, and exits based on emotion instead of structure. The problem usually isn't effort. It's that too many tools pull attention away from the one variable that every participant is reacting to in real time, which is price.
Price action fixes that by forcing a better question: what has price done here?
If buyers pushed into resistance and failed, that matters. If sellers broke a low but couldn't hold below it, that matters more than an oscillator reading. If the market keeps printing higher lows into a level, pressure is building whether an indicator confirms it yet or not.
That's why experienced traders often strip charts down. They want to read the market's trail directly. Recent swing highs, swing lows, breakouts, failed breaks, and pullbacks tell a cleaner story than a crowded screen.
A practical way to think about it is simple:
- Indicators summarize. They process what price already did.
- Price action reveals behavior. It shows where participants accepted price and where they rejected it.
- Structure creates decisions. Entries, stops, and targets become easier to define when the chart isn't cluttered.
Clean charts don't guarantee better trades. They make bad reasoning harder to hide.
That matters in day trading because speed isn't just about clicking fast. It's about recognizing context without hesitation. When the market moves quickly, you need a chart that lets you see the decision point.
If you want a plain-language primer on the stripped-down approach, Colibri Trader's guide on what price action trading is is a useful reference. The big takeaway is the same one most traders learn the hard way: discipline beats complexity. A simple read, executed well, usually outperforms a clever read executed poorly.
Decoding the Language of the Market
Price action starts making sense when you stop seeing candles as shapes and start reading them as transactions between buyers and sellers.

A chart isn't random noise. It's a record of where traders agreed, where they fought, and where one side lost control. In practical terms, price action day trading focuses on the recent chart, often the last 3 to 6 months of price history, to identify swing highs, swing lows, support, resistance, breakouts, and pullbacks, as outlined in this explanation of how to read price action.
Start with swing highs and swing lows
Market structure begins there.
An uptrend is a sequence where price keeps producing higher swing lows and then higher swing highs. A downtrend does the opposite. A range forms when neither side can push beyond the prior boundary with follow-through.
This sounds basic, but it changes everything. New traders often label trend from feeling. Skilled traders label it from structure.
Use this lens:
- Higher highs and higher lows: buyers are controlling pullbacks.
- Lower highs and lower lows: sellers are controlling rallies.
- Repeated failures at both edges: the market is balancing, not trending.
Once you can read those sequences, many flashy patterns lose their power over you. You stop asking, “Is this candle bullish?” and start asking, “Where is this candle forming inside the larger structure?”
A good candle in the wrong location is often a bad trade.
Treat support and resistance as zones
Most beginners draw one perfect horizontal line and expect the market to respect it to the tick. That's not how intraday charts usually behave.
Support and resistance work better as zones. They're areas where traders previously defended price, took profits, or got trapped. In live markets, especially fast ones, price often trades slightly through a level before reversing or continuing. That's one reason rigid line-based entries produce so many avoidable losses.
A useful interpretation looks like this:
| Element | What to look for | What it often means |
|---|---|---|
| Support zone | Multiple reactions near prior lows | Buyers have shown interest there |
| Resistance zone | Repeated stalls near prior highs | Sellers have defended that area |
| Breakout through zone | Strong close beyond the area | One side may be gaining control |
| Return to zone | Retest after breakout | Acceptance or failure becomes visible |
Read candlesticks by body and wick
Candlesticks matter, but not as isolated names.
A long body usually shows directional commitment during that bar. A long wick often shows rejection. Neither is enough on its own. Their meaning comes from location.
For example:
- A long upper wick into resistance can show sellers rejecting higher prices.
- A small indecisive candle in the middle of a range usually says very little.
- A strong body closing through a key level can signal momentum, but only if the next bars support it.
The wick tells you where price probed and failed. The body tells you where the bar closed the argument.
Learn to hear the conversation
When buyers keep defending pullbacks, the market is speaking clearly. When price spikes through a level and snaps back, the market is saying traders got trapped. When both sides keep reversing the other with no follow-through, stay cautious.
That's the language. Not pattern memorization. Not prediction. Observation.
Two Proven Intraday Setups and Their Rules
Most traders hurt themselves by trading too many patterns with too few rules.
That's a problem because many price-action strategies produce weak or random results, and backtesting is difficult but essential when evaluating them, according to Quantified Strategies' review of day trading price action strategies. The fix isn't to memorize more setups. The fix is to specialize in a small playbook and execute it with consistency.
One of the cleanest ways to start is with two setups that fit modern intraday conditions well: the breakout-pullback continuation and the failed breakout reversal.

Breakout pullback continuation
This setup works best when the market already has directional structure. You're not buying a random spike. You're participating after price shows it can break a meaningful area and then hold above it.
The sequence is straightforward. Price breaks resistance in an uptrend, or support in a downtrend. Then it pulls back toward the breakout area. If that area holds and order flow shifts back in trend direction, you have a continuation entry.
The key filter is context. Don't take this setup in the middle of a messy range and call it trend trading.
Rules that keep it clean:
- Context matters first: Use it when the market is already trending or pressing repeatedly into a clear level.
- Wait for the pullback: Chasing the first expansion bar often gives you the worst price.
- Use structure for the stop: Place the stop beyond the pullback failure point, not at some arbitrary distance.
- Demand room to target: If the next opposing level is too close, skip it.
Failed breakout reversal
This is the setup many traders talk about but few trade with patience.
A failed breakout happens when price pushes beyond a key level, attracts breakout traders, and then snaps back through that level. That reversal matters because trapped traders often fuel the move in the opposite direction when they exit.
This setup is especially valuable in current markets because false breaks are common around obvious highs, lows, and news-driven bursts. But it only works when failure is real. A slight pause after a breakout is not enough.
Look for these clues:
- Price breaks a clear level that many traders can see.
- The breakout doesn't hold.
- The market returns back through the level with intent.
- The reversal forms near a meaningful area, not in random space.
Practical rule: The best failed breakouts don't just stall. They reject and reclaim.
A lot of opening-range traders end up finding overlap here. If you trade those first-session expansions, Colibri Trader's piece on the opening range breakout gives useful context for where continuation breaks work and where they often fail.
Rule table for both setups
| Rule | Breakout-Pullback (Continuation) | Failed Breakout (Reversal) |
|---|---|---|
| Market context | Existing trend or pressure into a key level | Clear level with trapped breakout participants |
| What you want to see | Breakout, then orderly pullback holding the level | Break beyond level, then rejection and move back through it |
| Entry trigger | Lower-timeframe confirmation in trend direction after retest | Confirmation after reclaim back inside prior structure |
| Stop placement | Beyond the pullback low or high that invalidates the retest | Beyond the trap extreme or rejection bar |
| Target logic | Next expansion leg or opposing structure, only if room is clean | Return toward range middle, opposing side, or next clear level |
| Best condition | Trend day or strong directional session | Range edges, exhaustion pushes, obvious liquidity grabs |
| Skip when | Breakout is extended and pullback is shallow but weak | Reversal lacks real rejection or forms in noisy middle |
A good video example helps because these setups are visual. This walkthrough gives a useful chart-based demonstration:
What works and what usually fails
What works is boring. A clear level. Defined context. Patient entry. Logical stop. A target chosen before the click.
What fails is familiar. Chasing the first break. Calling every wick a trap. Taking reversals against strong trend pressure. Entering because the candle looks dramatic without asking who is trapped and where.
The setup is never the whole trade. The location and execution are.
Your Fortress of Risk and Money Management
A trader can read charts well and still fail from poor risk control.
That's why risk management is the primary professional skill in day trading. An industry analysis estimates that only about 4% of day traders can make a living, with common failure modes including ignoring key levels, emotional trading, and poor risk control, according to Trade That Swing's analysis of day trading success rates.

Risk first, opinion second
Most losing traders reverse that order. They fall in love with the setup, then force the position size to match the profit they want. Professionals do the opposite. They define the invalidation point first, then size the trade around it.
The logic is simple:
- Pick the chart location that proves your idea is wrong.
- Measure the distance from entry to that stop.
- Size the trade so the loss stays small enough to survive without emotional damage.
That process protects your capital and your judgment. Both matter.
Use the 1 percent rule carefully
A lot of traders need a hard ceiling because discretion disappears under pressure. The 1% rule gives that ceiling. It means you never risk more than a small slice of total capital on one trade.
The exact account math depends on your instrument and stop distance, but the principle doesn't change. Position size should come from risk per trade, not confidence level, not recent wins, and not urgency to make money back.
If your stop has to be wider because the structure demands it, your size goes down. If that makes the trade feel less exciting, that's a good sign you're acting like a risk manager instead of a gambler.
If the stop location is logical but the size feels too small, keep the stop and accept the smaller trade.
Demand a favorable payoff
A setup can be right and still not be worth taking.
The TLS workflow discussed later includes targeting at least a 2:1 reward-to-risk ratio in one published example. That's not magic. It is a way to avoid trades where the upside doesn't justify the downside. If the next trouble area is too close, your chart is telling you to pass.
Use a quick screen before entry:
- Is the stop based on structure? If not, the trade is loosely defined.
- Is the target realistic? Not fantasy. A level the market can reach.
- Is there enough room? If resistance or support sits right in front of your trade, the payoff may be poor.
Risk management sounds dull until you compare two traders with the same setup quality. One survives rough periods and keeps data clean. The other sizes emotionally, widens stops, and turns normal variance into account damage.
The first trader gets to stay in the game. That's the edge.
From Plan to Execution Your Daily Trading Routine
A strategy without a routine breaks down under live pressure.
The traders who improve fastest usually build a daily process that removes improvisation. One practical workflow uses a top-down filter through the TLS framework: identify the Trend on the hourly chart, mark the Level, then use a Signal on a lower intraday chart such as a 5-minute fakey or failed-breakout confirmation, while targeting at least a 2:1 reward-to-risk ratio, as described in this TLS price action workflow example on YouTube.

Before the open
The best intraday decisions usually begin before the session gets noisy.
Your pre-market job isn't to predict every move. It's to narrow focus. Start with the higher timeframe and answer three questions:
- What's the broader direction? Trend, downtrend, or range.
- Where are the important levels? Prior day high and low, obvious swing points, breakout areas.
- What kind of day would invalidate my bias? Write that down before the market argues with you.
A simple watchlist beats a long one. If you can't explain why an instrument is on your screen in one sentence, it probably doesn't belong there.
During the session
TLS keeps you from taking pretty signals in ugly locations.
Read it in order. Trend first. Then level. Then signal. Most traders do the reverse because the lower timeframe is exciting. They see a sharp candle on a fast chart and build a trade around it, even when it runs straight into higher-timeframe resistance.
A practical intraday checklist looks like this:
- Trend: Check the hourly chart. Is there directional bias, or are you forcing one?
- Level: Mark the area that matters. Not a vague zone somewhere on the screen. One specific area where price should prove something.
- Signal: Drop to the execution chart and wait for behavior that confirms the idea, such as a failed breakout or a controlled retest.
Trade alignment, not activity. A lower-timeframe signal without higher-timeframe context is often just noise.
After the close
Most traders skip the part that improves performance.
Post-market review is where you separate setup quality from execution quality. Save screenshots. Note whether the trade matched your plan. Record where you entered, where the stop belonged, and whether slippage, hesitation, or impatience changed the outcome.
Don't just journal wins and losses. Journal decisions.
A useful review format includes:
| Review item | What to note |
|---|---|
| Context | Trend, range, or transition |
| Level | The exact area that mattered |
| Trigger | What confirmed the entry |
| Execution | Clean fill, chase, hesitation, or early exit |
| Management | Held to plan or interfered emotionally |
| Lesson | One specific fix for next session |
Routine won't make every day smooth. It will make your mistakes easier to spot and harder to repeat.
Common Price Action Mistakes and How to Fix Them
The biggest mistake in price action day trading is assuming old pattern teaching still works the same way in current markets.
That assumption breaks traders because modern market microstructure changes how moves unfold. Algorithmic participation can make classic candle-pattern teaching too simplistic, and execution quality matters more than many mainstream guides admit, especially around slippage and false breakouts, as discussed in Optimus Futures' price action trading guide.
Mistake one: treating every breakout as equal
A breakout through a level means very little by itself. In fast electronic markets, price can poke through a level, trigger stops and breakout orders, then reverse hard once liquidity thins. Traders who buy the first push without checking context often become the fuel for the reversal.
The fix is to ask tougher questions:
- Did price break from a base or from an already extended move?
- Is there acceptance beyond the level, or just a quick spike?
- Would a retest improve the trade location?
If the answer is unclear, don't force it.
Mistake two: ignoring execution quality
Many traders do decent analysis and still get poor results because their fills are bad. They enter late, place stops where everyone else places them, or trade straight into spread widening and news volatility.
Execution quality improves when you:
- Wait for confirmation: A failed breakout is stronger after reclaim than during the initial poke.
- Respect liquidity vacuums: Thin areas can move fast in both directions. If you chase there, your stop often ends up in the worst spot.
- Avoid reactive clicks: If price is moving so fast you can't define the stop cleanly, the trade is already lower quality.
Mistake three: overtrading after frustration
The chart didn't cause that problem. Impatience did.
A lot of traders know their setups but start freelancing after one missed move or one loss. They widen standards, take signals in the middle of ranges, and call it adaptation. It's usually revenge trading in nicer language.
Use this repair checklist:
- After a loss: Pause and review whether the setup or the execution failed.
- After a missed move: Don't chase. Wait for the next structured opportunity.
- After two impulsive trades: Stop for the session and protect your decision quality.
Price action still works. But the traders who do well with it aren't just spotting patterns. They're reading structure, filtering for context, and executing carefully enough to avoid the traps modern markets set every day.
If you want a structured way to build that skill set, Colibri Trader offers price-action-focused education built around naked charts, discipline, and practical trade execution. It's one option for traders who want more than pattern memorization and need a repeatable process they can follow in live markets.