


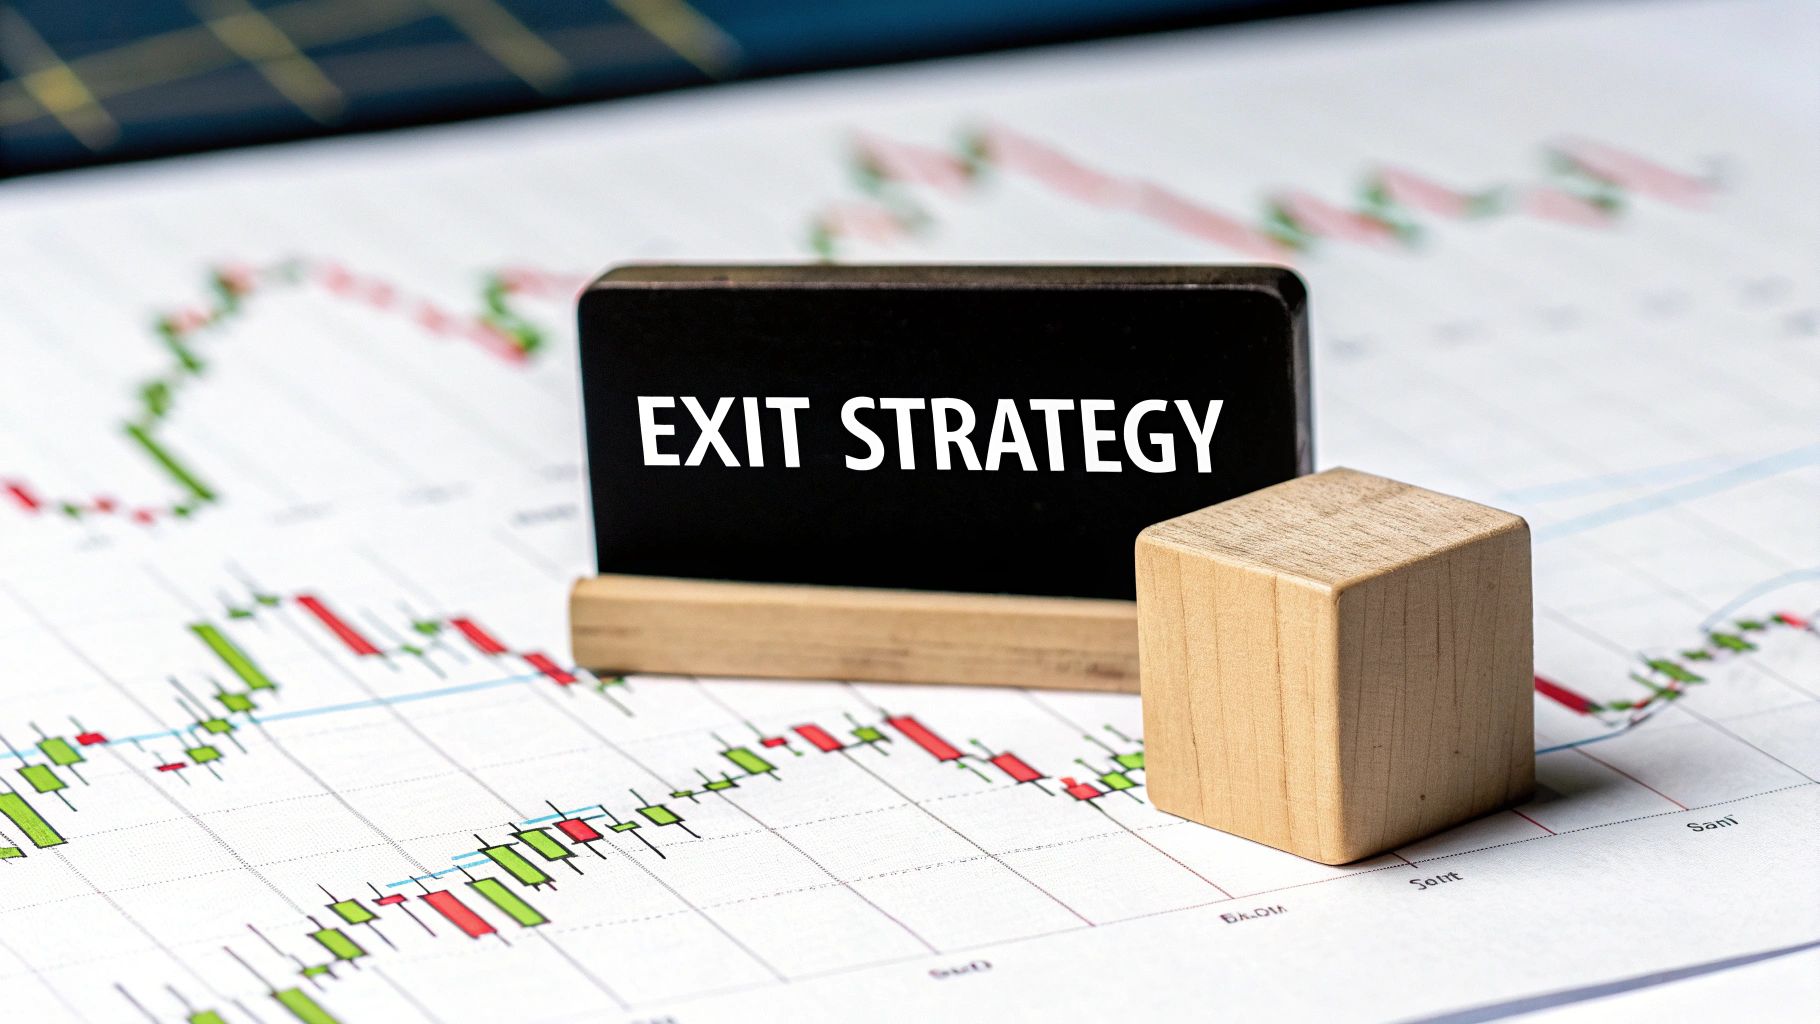
A Price Action Guide to Stop Loss and Take Profit Orders
At its core, a stop loss and take profit order is a simple instruction you give your broker: close my trade automatically when the price hits a specific level. A stop loss is your escape hatch, designed to get you out of a losing trade and limit the damage. A take profit is the opposite; it locks in your profits on a winning trade before the market has a chance to turn against you.
Think of them as your pre-flight checks and your emergency exit plan, all rolled into one. They are your non-negotiables for every single position you open.
Your Blueprint for Disciplined Trading

This is where professional trading truly begins. So many new traders get completely obsessed with finding that perfect entry point, but they completely miss what actually determines long-term success: knowing exactly when to get out.
Let’s be honest, a trade without a clear exit strategy isn’t a trade at all. It’s a gamble.
By using a stop loss and take profit, you shift trading from an emotional, seat-of-your-pants activity to a proactive, strategic business. These orders become the core of your trading blueprint—the plan you build before a single dollar is on the line. They act as your personal risk manager, on duty 24/7 to enforce your rules and protect your capital.
The Power of a Pre-Planned Exit
Can you imagine a pilot taking off without a destination in mind or any kind of emergency plan? It’s absurd. Yet, countless traders jump into the market every day doing the digital equivalent. This guide is here to make sure you're not one of them.
The benefits of setting your exits upfront are massive:
- Emotional Detachment: These orders take fear and greed out of the equation. Your exit logic is set when you're calm and analytical, not in the middle of a chaotic market swing.
- Capital Preservation: A stop loss is your safety net. It guarantees that one bad trade can't blow up your account because you've already defined your maximum acceptable loss.
- Systematic Profit-Taking: A take profit order prevents you from greedily watching a great trade turn into a loser. It forces you to take profits at a logical, pre-determined target.
By defining your exit points before you even enter a trade, you shift your focus from hoping for a specific outcome to simply executing a well-defined plan. This one change is the bedrock of consistent trading.
To build a truly resilient strategy, it helps to adopt proven methodologies. You can even explore powerful decision-making frameworks for smarter choices to give your approach more structure. It’s this kind of mindset that allows you to manage risk like a professional and trade with genuine confidence.
Why These Orders Are a Trader's Best Friend
Any trader who's been in the game for a while will tell you that stop loss and take profit orders aren't just features on a platform—they're non-negotiable rules for survival. Trading without them is like driving a race car without a brake pedal. It’s not a question of if you'll crash, but when and how badly.
These orders are your best friends because they build the foundation for consistent, professional trading: bulletproof risk management, rock-solid emotional discipline, and a repeatable game plan.
Protecting Your Capital and Your Mindset
Think of a stop loss as your financial seatbelt. It's the exact point you decide, before entering a trade, that your idea was wrong. You exit with a small, calculated loss, protecting you from the kind of catastrophic damage that blows up accounts. This decision is made when you're calm and rational—not in the heat of the moment when the market is screaming against you.
On the flip side, a take profit order is your mechanism for locking in wins. It stops greed from turning a great trade into a break-even or, even worse, a losing one. By setting a logical target beforehand, you silence that nagging internal voice asking, "Should I hold on for just a little more?" and just stick to the plan.
Your trading plan's main job is to protect you from yourself. A stop loss defends against fear and hope. A take profit defends against greed. Together, they let your strategy—not your emotions—drive your results.
The Mathematical Key to Long-Term Success
The real magic happens when you use a stop loss and take profit together. This combination allows you to define your risk-to-reward ratio on every single trade, and this ratio is the engine of long-term profitability. You'll often hear experienced traders talk about never taking a trade with less than a 2:1 ratio, meaning they aim to make at least $2 for every $1 they risk. For more on these tactics, check out the resources at TradeWithThePros.com.
Let's say you go long at $100. A 2:1 setup might mean placing your stop loss at $95 (risking $5) and your take profit at $110 (aiming for a $10 gain).
This isn't some random rule; it's about building a positive mathematical expectancy. With a solid 2:1 reward-to-risk ratio, you can be profitable over the long run even if you only win 40% of your trades. The math simply works in your favor.
Let's break down how this impacts your account over 10 trades, assuming you risk $100 on each one.
How Risk-to-Reward Ratios Impact Long-Term Profitability
This table shows how maintaining a consistent Risk-to-Reward (R:R) ratio affects your bottom line across 10 trades, even with a win rate below 50%.
| Win Rate | Risk-to-Reward Ratio | Winning Trades | Losing Trades | Net Profit (Assuming $100 Risk) |
|---|---|---|---|---|
| 40% | 1:1 (Risk $100 to make $100) | 4 | 6 | -$200 |
| 40% | 2:1 (Risk $100 to make $200) | 4 | 6 | +$200 |
| 40% | 3:1 (Risk $100 to make $300) | 4 | 6 | +$600 |
The numbers don't lie. That shift from a 1:1 to a 2:1 ratio completely flips the outcome from a net loss to a net profit, even with more losing trades than winners.
This proves you don't need a crystal ball to be a successful trader. You just need to make sure your wins are bigger than your losses—a discipline that starts with the simple act of setting your stop loss and take profit on every single trade.
Placing Your Stops with Price Action Precision
Throwing a stop loss on your chart based on a random percentage or a fixed dollar amount is a classic rookie move. It's a total guess. Pros don't guess; they listen to what the market is telling them. The best, most durable exit points aren't just made up—they're discovered right there on the chart, using the universal language of price action.
This approach syncs your strategy with the market's natural ebb and flow. Instead of forcing your will on the market with arbitrary rules, you're placing your orders at logical barriers the market has already respected. It's about hiding your stop loss behind an obstacle the price has to work to break and setting your take profit where momentum is likely to fizzle out.
Using Support and Resistance Levels
The most fundamental way to set your stop loss is by finding key support and resistance levels. Just think of them as floors and ceilings. Support is a price level where buyers have historically jumped in and propped up the price. Resistance is where sellers have taken control and smacked the price back down.
When you go long (buy), a logical spot for your stop loss is just below a solid support level. That level is your buffer zone. If the price smashes through that floor, it's a huge red flag that your trade idea was wrong, and it’s time to get out.
On the flip side, if you're shorting (selling), your stop loss goes just above a clear resistance level. That ceiling should keep the price contained. A break above it pretty much invalidates your whole reason for being in the trade.
This infographic shows how these core principles fit into a larger framework of disciplined trading.
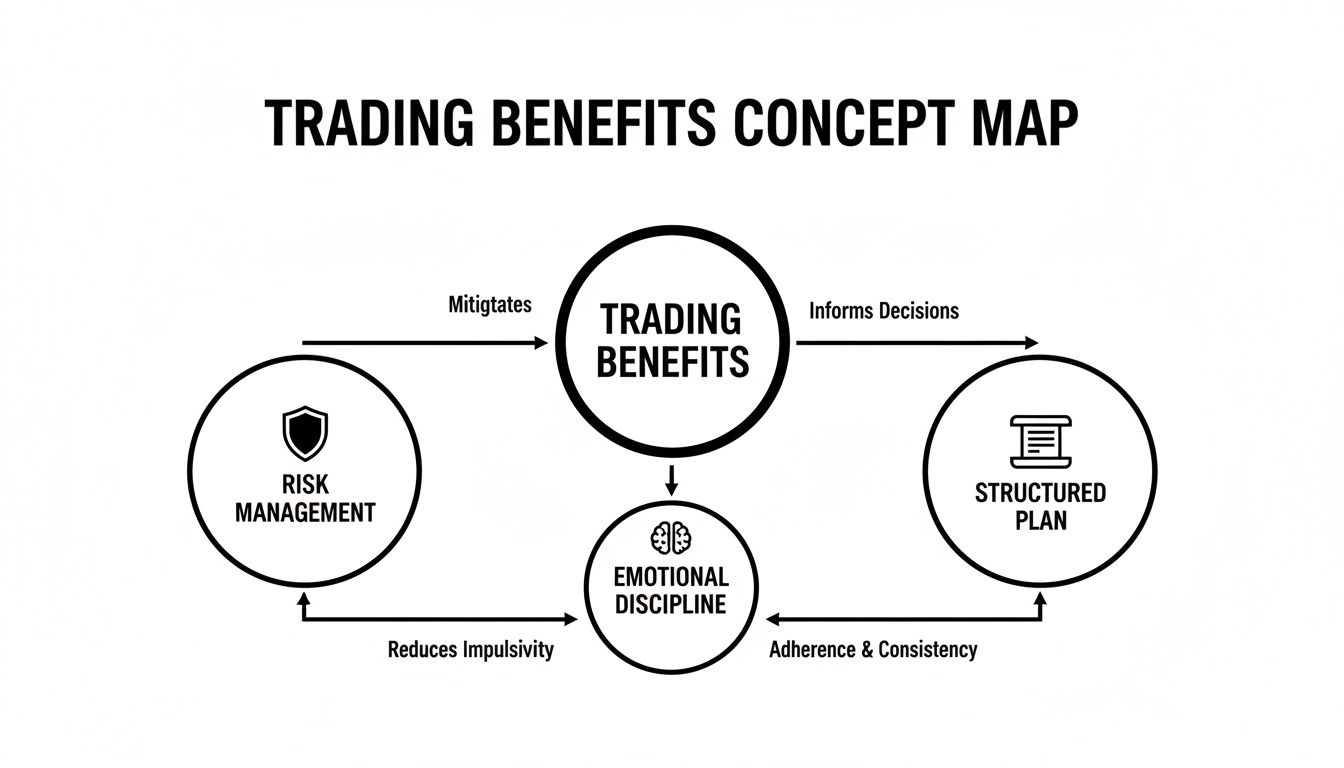
As you can see, risk management, emotional control, and planning aren't separate things. They're all interconnected pillars you need for a solid trading strategy.
Following Market Structure with Swing Points
Another killer price action technique is to use the market's structure—specifically, its swing highs and swing lows. An uptrend makes a series of higher highs and higher lows. A downtrend carves out lower lows and lower highs. These pivot points are the market's footprints, telling you where it's been and where it might go next.
- For Long Trades: Tuck your stop loss just below the most recent significant swing low. The uptrend is healthy as long as the market keeps making higher lows. A break below that last swing low is your early warning signal that the trend is in trouble.
- For Short Trades: Place your stop loss just above the latest significant swing high. If the price breaks above that peak, it's a clear sign the downtrend is losing steam.
By using swing points, you are essentially letting the market's own structure define your risk. You’re not just picking a random spot; you're placing your stop at a location that has structural significance.
This method naturally forces you to trade with the prevailing trend, not fight it. It keeps your stop loss clear of the random "noise" and places it at a point that truly matters. To get really good at spotting these levels, you have to know how to read price action like the back of your hand. That skill is the foundation for everything. It's how you move from just placing orders to making smart, strategic decisions that give your trades the best possible chance to win.
Calculating Position Size to Control Your Risk

Knowing where to place your stop loss based on the chart is a massive step forward. But the skill that truly separates the amateurs from the pros is knowing how much to risk on any given trade.
This is where position sizing comes into play. It's the critical link that ensures you risk a consistent, manageable amount on every single trade, no matter how wide or tight your stop loss is.
Without it, a wide stop on one trade could wipe out a huge chunk of your account, while a tight stop on another might barely register. This kind of inconsistency is a recipe for disaster. Proper sizing smooths out this risk, making every loss predictable and, more importantly, survivable.
The Position Sizing Formula
The formula itself is refreshingly simple. It connects your total account capital, your personal risk tolerance, and the specific details of your trade into one clear number. You only need to know three things to get it right.
Here’s what you need:
- Account Balance: The total capital you have in your trading account.
- Trade Risk %: The maximum percentage of your account you're willing to lose on a single trade. Most professional traders stick to a strict 1-2% rule.
- Stop Loss Distance: The distance in price (pips, points, or dollars) between your entry price and your stop loss.
Once you have these numbers, the math is straightforward:
Position Size = (Account Balance x Trade Risk %) / Stop Loss Distance
This calculation ensures that if your stop loss gets hit, you lose exactly the amount you planned to risk—no more, no less. It’s the ultimate tool for controlling your downside.
Putting It All Together
Let's walk through a quick example. Imagine you have a $10,000 trading account and you’ve decided to risk 1% on any single trade. Your analysis has pointed out a great long setup on a stock with an entry at $50 and a logical stop loss at $48.
First, calculate your maximum dollar risk: $10,000 x 0.01 = $100.
Next, figure out your stop distance per share: $50 (entry) – $48 (stop) = $2.
Finally, divide your dollar risk by your per-share risk to find your position size: $100 / $2 = 50 shares.
By buying 50 shares, a move down to your $48 stop loss will result in a precisely controlled $100 loss. For a more automated approach, using a dedicated position size calculator can make this process instant.
Common Trading Mistakes and How to Avoid Them
Knowing how to set a stop loss and take profit is the easy part. The real challenge is having the discipline to let them do their job without meddling. Even the most bulletproof trading strategy can be completely wrecked by a few simple, emotion-driven mistakes.
The key to consistency is learning to spot these psychological traps before you stumble into them.
One of the most destructive habits I see is traders moving their stop loss further away from their entry once a trade starts to sour. Let's be honest, this isn't strategy; it's pure hope. You're effectively ripping up your trading plan and widening your risk simply because you can't stomach taking a small, pre-defined loss.
The Pitfalls of Fear and Greed
Another classic mistake is setting your stop loss too tight. It feels safe, like you're minimizing your potential loss, but in reality, you're often just placing it right in the path of normal market volatility. This is a surefire way to get shaken out of perfectly good trades that just needed a little breathing room before moving in your favor.
On the flip side, setting a take profit that's wildly ambitious can be just as damaging. A target placed miles beyond any logical resistance level is just wishful thinking. You'll watch profitable trades get tantalizingly close, only to reverse and turn into frustrating losers.
The most successful traders don't avoid losses; they manage them. Your stop loss is your risk management tool, not a suggestion to be ignored when you're feeling fearful.
Building a rock-solid, rules-based framework for your exits is everything. In fact, one extensive study that dug into decades of intraday data concluded that stop loss strategies were “entirely necessary,” while take-profit rules were more of a “luxury” that could cap your upside. You can read more about the research that puts stop loss discipline first in this detailed empirical study on stop loss and take profit orders. The message is clear: mastering your stop loss is priority number one.
Building Your Rules for Success
To build the discipline you need, you have to operate with clear, non-negotiable rules. Here are three you can put into practice immediately:
- Rule #1 The "Set It and Forget It" Rule: Once your stop loss is placed based on sound technical analysis, you are not allowed to move it further away to increase your risk. Ever.
- Rule #2 The "Give It Room" Rule: Always place your stop a reasonable distance beyond a key price action level (like a swing low or support), not directly on it. This cushion helps you avoid getting clipped by random market noise.
- Rule #3 The "Be Realistic" Rule: Set your take profit just before a logical barrier, like the next major resistance level. Don't shoot for the moon on every trade; aim for consistent, high-probability wins.
These mistakes are so common because they're wired into our human psychology. The best way to beat them is to study other common trading mistakes to avoid and build a concrete plan to keep your emotions on the sidelines.
Frequently Asked Questions About Stop Loss and Take Profit
Even the best-laid trading plans run into questions when the market opens. This section is all about tackling those common "what if" scenarios that pop up when you're setting your stop loss and take profit orders.
Think of it as your quick-reference guide for handling the tricky situations that every trader faces.
Should I Use a Trailing Stop Loss
A trailing stop is a powerful tool, but it's definitely not for every situation. In a nutshell, it automatically follows your trade into profit, moving your stop loss up as the price rises. This is a great way to lock in gains while still giving a winning trade the space it needs to keep running.
The biggest upside? It helps you capture those huge, unexpected moves. Instead of taking profit at a fixed target, you let the market's momentum decide your exit, potentially turning a good trade into a great one.
But there's a catch. Trailing stops are notoriously sensitive to normal market volatility. A healthy pullback or a bit of choppy price action can easily trigger your stop, kicking you out of a perfectly good trade just before it takes off again.
- Best Use Case: In strongly trending markets where your goal is to let a winner run as far as it can possibly go.
- When to Be Cautious: Sideways, choppy, or ranging markets. The constant back-and-forth price action is almost guaranteed to trigger a trailing stop prematurely.
What Is a Good Risk to Reward Ratio
There’s no magic number here. The "best" risk-to-reward (R:R) ratio is completely tied to your trading strategy and, most importantly, your historical win rate. That said, a solid benchmark for a lot of strategies is a minimum of 1:2. You're aiming to make at least $2 for every $1 you put on the line.
Why does this matter so much? A higher R:R, like 1:3 or even 1:4, means you can be profitable even if you lose more trades than you win. This is the secret sauce for many trend-following strategies, where traders might take a string of small losses while waiting to catch that one massive, portfolio-making move.
On the other hand, a high-frequency scalper might do just fine with a 1:1 ratio, but only if their win rate is incredibly high—think 65% or more. The goal is always to find a balance where your average wins are big enough to comfortably outweigh your average losses over time.
The real objective isn't just finding a good ratio. It's about making sure your chosen ratio and your actual win rate combine to create a positive mathematical expectancy. That's the statistical backbone of any profitable trading career.
Can I Set These Orders on Any Asset
Absolutely. The ability to place a stop loss and a take profit is a fundamental feature on just about every modern trading platform, no matter what you're trading. This includes:
- Stocks: Shares from companies on the NYSE, NASDAQ, and other global exchanges.
- Forex: Major and minor currency pairs like EUR/USD or GBP/JPY.
- Cryptocurrencies: Digital assets like Bitcoin (BTC) and Ethereum (ETH).
- Commodities: Raw materials such as gold, crude oil, and natural gas.
- Indices: Market baskets like the S&P 500 or the DAX.
While placing the order is the same mechanical process everywhere, the application is what requires a trader's touch. Every asset has its own "personality"—its typical volatility, trading hours, and reaction to news. A stop loss on a wildly volatile crypto asset will need to be much wider than one on a stable blue-chip stock, just to survive the normal daily price swings.
The core principles of using support, resistance, and market structure are universal, but you have to adapt your placement to the unique rhythm of the asset you're trading.
At Colibri Trader, we teach you how to master price action so you can confidently place your stop loss and take profit orders like a professional. Our programs are designed to give you a clear, repeatable process for managing risk and achieving consistent results. Learn more and transform your trading today.