


Your Guide to Trading with a Currency Strength Meter
A currency strength meter is a fantastic visual tool that shows you, at a glance, which currencies are strong and which are weak right now. Think of it as a real-time leaderboard for the entire forex market, ranking each currency against all its peers.
What Is a Currency Strength Meter Anyway?
Imagine you’re trying to pick the winner of a horse race, but you’re only allowed to watch two horses run against each other. You'd have no idea if a completely different horse was actually miles ahead of the entire pack. Forex trading can feel a lot like that when you're just staring at a single pair like EUR/USD.
This is the exact problem a currency strength meter solves.
Instead of that narrow, one-on-one view, it gives you a bird's-eye perspective of the whole market. It calculates how a single currency, say the Japanese Yen (JPY), is performing against all other major currencies, not just the US Dollar. By doing this for every currency, it builds a simple, dynamic ranking from strongest to weakest.
The Sports League Analogy
I find it helpful to think of the eight major currencies (USD, EUR, GBP, JPY, CHF, CAD, AUD, NZD) as teams in a sports league.
- A single forex pair like GBP/USD is just one game. It tells you who won that specific match-up, but it reveals nothing about how either team is doing against the rest of the league.
- A currency strength meter is the league table. It instantly shows you the overall standings, highlighting the top-performing teams (strong currencies) and those struggling at the bottom (weak currencies).
This "league table" view gives you a massive strategic edge. You can immediately spot the biggest mismatches—the top team playing against the bottom one—which often represent the highest-momentum trading opportunities.
How It Transforms Your Market View
This tool really became a game-changer for traders who, like me, once felt overwhelmed by flipping through endless charts. These indicators started gaining serious traction on platforms like TradingView around mid-2015. By 2018, their use had exploded, especially with the retail trading booms that followed events like Brexit.
A strength meter typically calculates its rankings by averaging the percentage price changes across all 28 major pairs. This gives a much more balanced picture than something like the DXY index, which is heavily skewed towards the EUR.
A currency strength meter cuts through all the market noise to answer one simple question: "Which currencies are genuinely moving the market right now?" It shifts your focus from guesswork to a data-backed scan of the entire forex landscape.
This approach gives you a powerful filter for your trading decisions. Instead of randomly cycling through dozens of charts hoping to find a setup, you can use the meter to pinpoint the pairs with the most potential energy. This is a crucial first step in understanding the broader picture of what market sentiment is at any given moment.
By grasping this core function, you're much better equipped to find clean trends and sidestep choppy, range-bound pairs. For a deeper dive into this powerful tool, including how it works and practical trading strategies, I recommend checking out A Trader's Guide to the Currency Strength Meter. This method helps you focus your analytical energy where it matters most, guiding you toward pairs that are already showing a clear directional bias.
How to Read the Story Your Meter Is Telling You
A currency strength meter is a fantastic tool. It takes all the noise and complexity of the market and boils it down into a simple, visual story. Once you learn how to read this story, you can instantly see which currencies are leading the charge and which are getting left behind.
Most meters use straightforward displays like bar graphs, line charts, or just a numerical scale. Each currency gets a score, usually ranging from positive (strong) to negative (weak). Your first job is to spot the outliers—the currencies sitting at the extreme ends of the scale. These are your market leaders and laggards.
- The Stars (Strongest Currencies): These are the currencies with the highest positive scores. They’re showing broad-based strength against everyone else.
- The Stragglers (Weakest Currencies): These have the lowest negative scores, meaning they’re losing ground across multiple pairs.
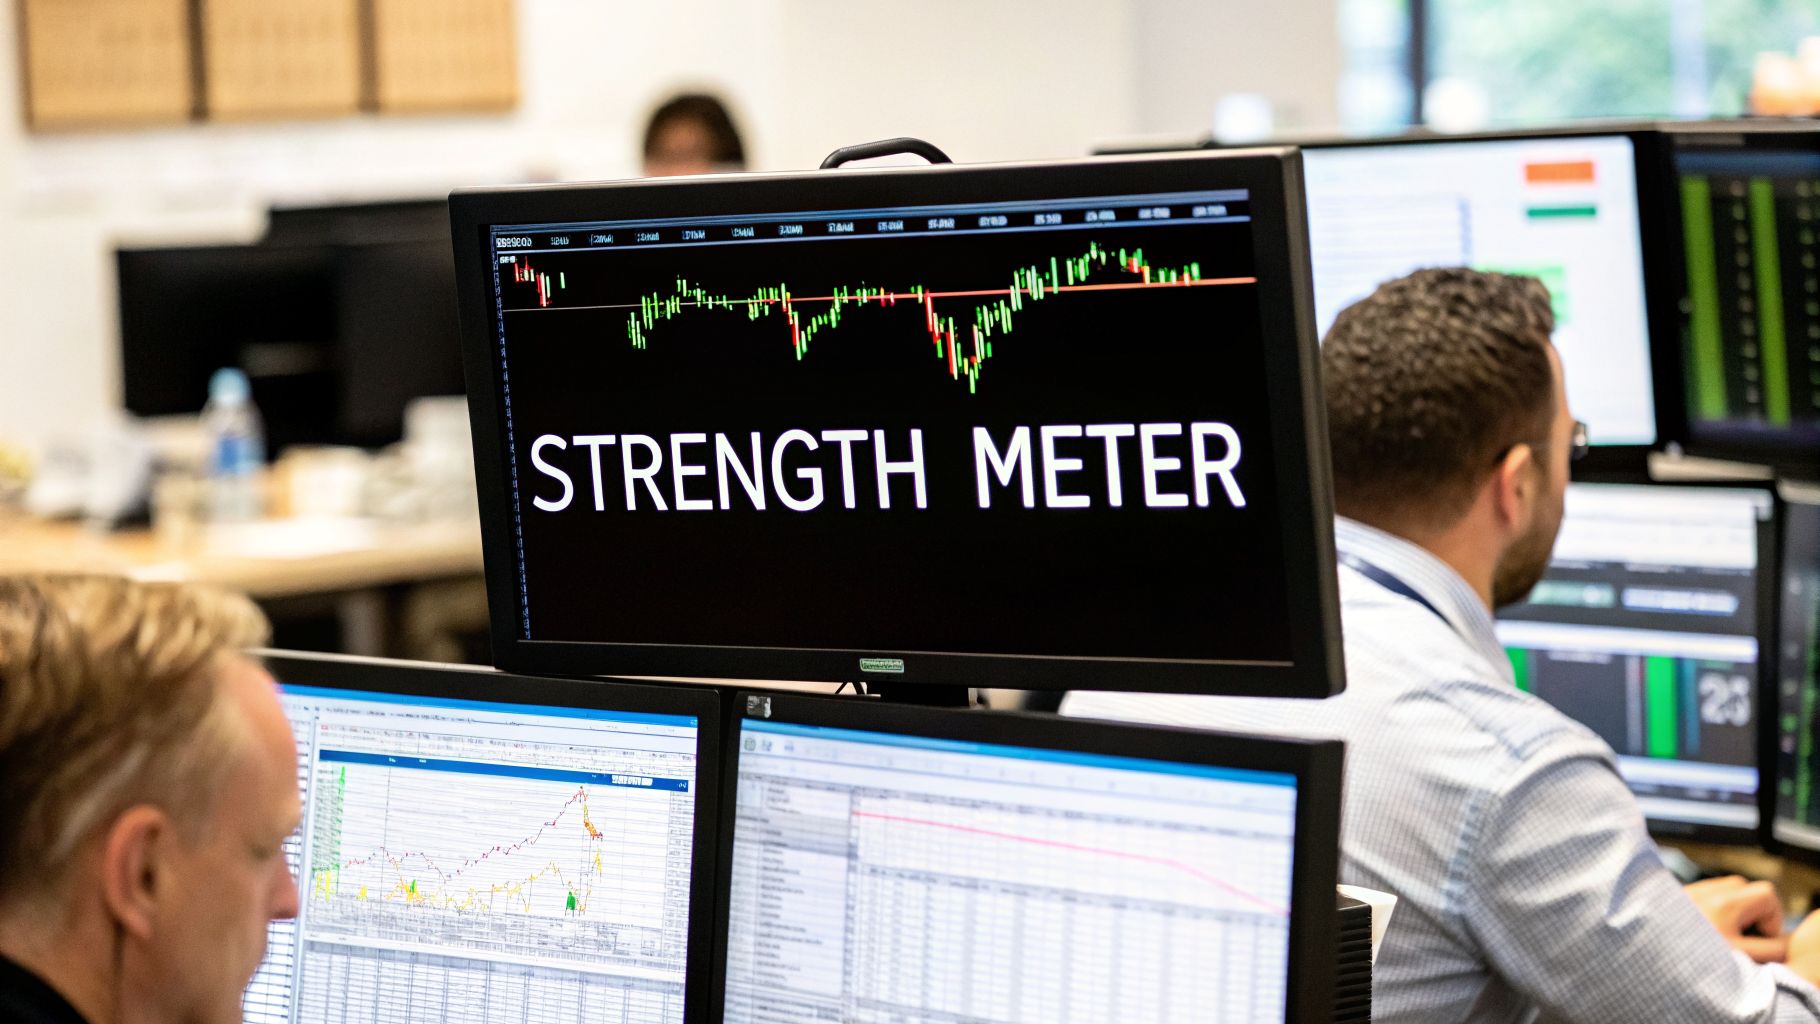
This is what I mean by seeing the full market picture instead of getting tunnel vision on a single pair.

The image above illustrates that jump perfectly. You go from looking at a single battle (one pair) to seeing the entire war (the whole market), which is exactly what a currency strength meter allows you to do.
Understanding the Power of Divergence
Simply finding the strongest and weakest currency is only half the battle. The real magic, where the high-probability trade ideas come from, is in the divergence between them. Divergence is just the gap or spread between the top-ranked and bottom-ranked currency. A wide divergence screams strong, directional momentum.
Think of it like a tug-of-war. If one team is pulling with all its might (the strong currency) and the other team has completely let go of the rope (the weak currency), that rope is going to fly in one direction. That's the clean momentum every trader is looking for.
The greater the divergence between the strongest and weakest currencies, the higher the probability of a strong, sustained trend on that corresponding currency pair.
This one concept turns abstract numbers into a concrete trading idea. You're no longer guessing which pair might move. The meter is pointing you directly to the pairs with the most pent-up energy, acting as a powerful filter for quality setups.
Interpreting Currency Strength Meter Readings
To make this even clearer, here’s a quick-reference table that breaks down what different meter readings are telling you and how you might act on them.
| Strength Reading / Divergence | Interpretation | Potential Action |
|---|---|---|
| High Positive Score (+70 to +100) | The currency is showing extreme strength across the board. | Look to buy this currency against the weakest available currency. |
| High Negative Score (-70 to -100) | The currency is showing extreme weakness across the board. | Look to sell this currency against the strongest available currency. |
| Wide Divergence | A strong currency is paired against a weak one (e.g., +80 vs -75). | This signals a high-momentum environment. Ideal for trend-following strategies. |
| Low or Neutral Scores (-20 to +20) | The currency has no clear directional bias; it's likely in a range. | Avoid trading this currency or look for range-bound opportunities. |
| Converging Scores | A strong and weak currency are moving back toward the middle. | Momentum may be fading. Time to tighten stops or consider taking profit. |
This table isn't a set of rigid rules, but rather a guide to help you build an instinct for what the meter is communicating. With practice, these interpretations will become second nature.
A Practical Example of Interpretation
Let's make this tangible. Imagine you fire up your currency strength meter and see these readings for the current session:
- Australian Dollar (AUD): +80
- Japanese Yen (JPY): -75
Right away, that tells a very compelling story. The AUD is the strongest currency on the board, with significant buying pressure across all its pairs. At the same time, the JPY is the absolute weakest, facing widespread selling.
This huge divergence between +80 and -75 is a bright, flashing signal. It strongly suggests the AUD/JPY pair is in a powerful uptrend. The buyers (AUD bulls) are in total control, and the sellers (JPY bears) are putting up very little resistance.
This insight gives you a clear directional bias. Your next move isn't to just blindly hit "buy." It's to open the AUD/JPY chart and use your price action skills to find a high-probability entry that lines up with this underlying momentum. The meter has done the heavy lifting of scanning the market for you; now you just have to execute. This is how you start building a real, consistent edge.
Unlocking High-Probability Trades with Strength Analysis

Now we get to the part that really matters: turning all this data into actual trade ideas. A currency strength meter isn't just a fancy dashboard. It's a filter, designed to point you towards the best setups on the board by showing you the path of least resistance.
The guiding principle is incredibly simple, but powerful: pair the strongest currency with the weakest one. This strategy helps stack the odds in your favour. You're finding where the money is flowing from and where it's flowing to, identifying pairs with the most momentum and potential for clean trends.
Think about it like picking teams for a football match. You wouldn't pit two top-tier, evenly matched teams against each other. That match would be choppy and hard to predict. You want the league champion playing against the team at the very bottom of the table. That’s where you see decisive, one-sided action.
Your Strategic Co-Pilot, Not a Magic Button
To use a currency strength meter properly, you need a crucial mindset shift. It is not an entry signal. So many traders make the mistake of seeing one currency shoot up and another one drop, and they immediately hit the buy or sell button. This is a recipe for disaster.
Instead, see the meter as your strategic co-pilot. Its job is to scan the whole market and say, "Hey, based on current momentum, this is where you should focus your attention." It does the heavy lifting of screening the market, but you—the pilot—are still responsible for flying the plane and nailing the landing (your entry).
This approach keeps you from getting distracted by low-quality setups or getting chewed up in range-bound, sideways markets. It narrows your focus to only A-grade opportunities where a clear imbalance exists.
By identifying the strongest versus weakest currencies, you are isolating pairs with the highest potential for clean, directional movement. The meter finds the opportunity; your price action skills define the entry.
This disciplined process is so much more efficient than manually clicking through dozens of charts. You let the data point you to the action, which saves your mental energy for what really counts: precise execution.
The Three-Step Framework for Finding A-Grade Setups
To make this practical, you can follow a simple, repeatable framework. This three-step process bridges the gap between the meter's high-level data and your chart-level analysis.
Identify Significant Divergence: Look at your currency strength meter. Find the two currencies at the absolute extremes of the scale. You're looking for a clear leader (e.g., GBP at +85) and a clear laggard (e.g., CHF at -80). The wider the gap, the better.
Open the Corresponding Chart: Once you've found your strong/weak pair, open that specific chart. In the example above, you'd open the GBP/CHF chart with a clear directional bias in mind—in this case, you're only looking for buying opportunities.
Apply Your Price Action Analysis: This is where you zoom in and use your own trading strategy. Look for confirmation from price action. Maybe it's a breakout from consolidation, a retest of a key support level, or a clear impulse move. This step is critical for building confluence in your trading, as it ensures the market structure actually validates what the meter is telling you.
This method forces you to be patient and systematic. You're not just chasing random price wicks; you're trading with the underlying flow of market-wide momentum.
Real-world events often create these divergences. For example, during the summer of 2022, as US inflation peaked at 9.1%, the USD's strength surged while the EUR faltered. This created perfect conditions for shorting EUR/USD. The meter gave you the "what" (which pair to trade), and your price action analysis provided the "when" (the precise entry point). This combination is the key to consistently finding and executing high-probability trades.
Integrating the Meter with Your Price Action Strategy

This is where everything comes together. A currency strength meter gives you the big-picture context of the market, but price action provides the surgical precision you need to execute a trade. Combining the two is about making your existing strategy smarter, not about cluttering your charts with another confusing indicator.
Think of the meter as your primary filter. It tells you what to trade by shining a spotlight on the most significant strength imbalances. Once you know which currencies are pulling apart, you turn to your charts and use your price action skills to figure out when and where to get in.
This two-step process is incredibly powerful. It stops you from chasing trades in choppy, low-momentum pairs and forces you to focus only on markets where a clear power struggle is already underway. It’s about stacking the odds in your favour before you even look at a single candlestick.
Using Strength to Confirm Price Action Signals
A currency strength meter provides the "why" behind the price action "what." This synergy builds tremendous confidence in your trade ideas because you have two independent sources of information pointing in the same direction.
Let's look at a classic example. Imagine you're watching a pair that’s been stuck in a tight consolidation for days. Suddenly, price breaks out to the upside. Is this a genuine breakout or a fakeout designed to trap eager traders?
You glance at your currency strength meter. You see the base currency has just surged to become one of the strongest, while the quote currency has dropped to the bottom of the list. That divergence is your confirmation. The breakout isn't random; it's being driven by a genuine, market-wide shift in momentum. This gives you the green light to trade the breakout or look for an entry on the first pullback.
Finding High-Probability Reversal Zones
This integration works just as well for reversal strategies. Let's say you've identified a key supply or demand zone on your chart. As price approaches this zone, you need to decide if it will hold or break.
Here’s how the meter helps you make that call:
For a Demand Zone (Buy Setup): As price drops into your demand zone, you check the meter. You notice the base currency, despite the recent price drop, is still fundamentally strong, while the quote currency is weak. This tells you the broader trend is still up and this dip into demand is likely just a pullback—a perfect opportunity to join the dominant trend.
For a Supply Zone (Sell Setup): Price rallies into a critical supply zone. A quick look at the meter shows the base currency is actually one of the weakest on the board, and the quote currency is strong. This suggests the rally is a counter-trend move running on fumes and is highly likely to fail at this major resistance area.
In both cases, the meter provides a crucial layer of context that you simply can't get from the price chart alone. This is a core part of learning how to read price action like a professional—understanding the larger forces that are influencing the candles on your screen.
Real-World Application and Results
Let’s look at a historical example. Picture this: it's January 2023. Aggressive Fed rate hikes have made the USD king, showing a +22.1% strength reading over 90 days. Meanwhile, the ECB is lagging, causing the EUR to weaken. This clear divergence, easily spotted on a currency strength meter, sets the stage for high-probability sell setups on EUR/USD. In fact, some data shows that 68% of traders who align 4H strength with the daily trend see reduced drawdowns.
This isn't a new concept. During the 2008 financial crisis, the JPY's safe-haven status sent its strength soaring to +18.9% while the risk-on AUD crumbled. A meter would have flagged that divergence, pointing to powerful shorting opportunities in AUD/JPY.
The currency strength meter acts as your risk management co-pilot. By ensuring you only trade pairs with clear momentum, it helps you avoid the choppy, unpredictable markets where most accounts go to die.
For traders learning to ditch lagging indicators, the meter is a perfect fit. For instance, if you see the AUD ranked #1 with a +0.59% reading while the JPY is at the bottom, entering a long trade at a confirmed demand zone on the AUD/JPY chart becomes a much higher-probability setup. This simple filter sharpens your money management by guiding you toward strong trends where achieving a healthy 2:1 risk-to-reward ratio is far more realistic.
Avoiding the Common Traps and Misconceptions
While a currency strength meter can be a great addition to your toolkit, it’s not a magic bullet. Like any indicator, it’s surrounded by traps that can lead to some painful mistakes if you aren’t careful. Getting wise to these common misconceptions from day one will save you a lot of grief—and protect your trading account.
The single biggest mistake I see traders make is treating the meter like a crystal ball. They’ll see one currency shoot to the top of the scale, another plummet to the bottom, and they’ll dive headfirst into a trade without a second thought. That’s a fast track to getting your account burned.
Think of a currency strength meter as a filter, not a signal generator. Its real job is to guide you toward pairs showing high momentum, not to pinpoint the exact moment to hit buy or sell.
The Danger of Short-Term Noise
Another major pitfall is getting laser-focused on the really short time frames. A currency might look incredibly strong on a 5-minute meter reading because of a sudden news spike or a random burst of volatility. But zoom out to the daily chart, and you might find that same currency is locked in a massive, long-term downtrend.
Relying solely on low-timeframe readings is like trying to predict a river’s direction by staring at a single ripple. You completely miss the bigger picture of the underlying current.
To sidestep this trap, you absolutely have to use a multi-timeframe approach:
- Higher Time Frames (H4, D1): Use these to figure out your main directional bias. This is the river's powerful, overarching current.
- Lower Time Frames (M15, H1): Use these to find entry points that flow with that higher-timeframe direction. This is you catching a smaller wave that's moving with the main current.
This layered analysis makes sure you’re trading with the dominant market flow, not fighting against a brief, meaningless flicker of noise. It gives your trading decisions a much more solid foundation.
Chasing Extremes Without Confirmation
When you see a currency hit an extreme reading like +95 or -95, the temptation to jump in is huge. It feels like a sure thing. But blindly chasing these extremes is like trying to catch a falling knife. More often than not, these extreme readings happen right at points of exhaustion, just before a reversal or a major pullback.
A currency that's been trending hard for days might flash an extreme reading just as it slams into a major weekly resistance level. If you jump in at that exact moment, you're often just buying the absolute top or selling the absolute bottom.
A currency strength meter tells you what has happened, not what will happen next. An extreme reading is a measure of past momentum; it is not a guarantee of future performance. Use price action to confirm that the momentum is still present.
Instead of just chasing the number, let that extreme reading be your signal to go to the charts. Look for real evidence that the trend is still healthy. In an uptrend, is the price still carving out higher highs and higher lows? Is it smashing through support or resistance with conviction?
If the meter is screaming "extreme strength" but the price action on your chart looks weak and is printing reversal patterns, you have to trust the price action. The meter gave you the context, but the chart gives you the final verdict. By demanding this confirmation from the price itself, you avoid becoming the exit liquidity for the smart traders who got in early. You ensure you're trading with current momentum, not just chasing a number on a screen.
Frequently Asked Questions
Even after you get the hang of what a currency strength meter does, specific questions always pop up when traders try to fit it into their day-to-day routine. This section tackles the most common ones I hear, giving you straight answers to help you use this tool with confidence.
What Is the Best Time Frame to Use for a Currency Strength Meter?
There's no single "best" time frame; it all comes down to your personal trading style. What works for a scalper hunting for a few pips is useless for a swing trader holding positions for weeks. The key is to match the meter's time frame to your trade's intended holding period.
For example, a day trader who's in and out of the market within the same session will get the most value from the H1 and H4 charts. These frames give a solid read on which currencies are picking up steam during the day.
On the other hand, a swing trader holding positions for days or even weeks should focus on the D1 and W1 charts. These higher time frames show you the major, underlying currents driving the market. This lets you align your trades with the big, long-term capital flows.
The most effective approach is almost always multi-timeframe analysis. You might use the daily (D1) meter to find a strong directional bias, then drop down to the hourly (H1) to pinpoint a good entry that lines up with that bigger trend. This makes sure you're swimming with the current, not fighting against it.
Are Free Currency Strength Meters Reliable Enough?
Absolutely. For the vast majority of retail traders, the free currency strength meters you can find on platforms like TradingView or other forex sites are more than enough. They pretty much all use the same standard math: averaging a currency’s performance against a basket of the other majors.
Paid versions usually just offer bells and whistles, not a fundamental jump in accuracy. These extra features might include:
- Custom alerts sent to your phone or email.
- The ability to look at historical strength data for backtesting.
- More complex visuals or proprietary formulas.
But for the core job of spotting strong vs. weak currencies to back up your price action strategy, a good free meter is perfectly fine. Success doesn't come from the most expensive tool. It comes from picking one, learning its quirks, and sticking with it to build consistency.
How Is This Different from the US Dollar Index (DXY)?
This is a critical point that trips up a lot of traders. The US Dollar Index (DXY) is not a true measure of the dollar's overall strength. It only measures the dollar's performance against a fixed, weighted basket of just six other currencies.
The crucial thing to know is that this basket is massively tilted towards the Euro, which makes up 57.6% of the DXY's calculation. This means a big move in EUR/USD, maybe driven by news from the ECB, can throw the DXY's reading way off, even if the dollar is actually strong against the JPY or GBP.
A currency strength meter, however, is much more balanced and comprehensive. It calculates each currency's strength on its own against all other majors (usually seven of them). This gives you a true, 360-degree picture of the entire market. It lets you compare the relative strength of any two currencies directly, not just how something is behaving against the US Dollar.
Can I Use This Tool for Trading Stocks or Commodities?
While the meter is built for the forex market, its insights can be an interesting secondary tool for other assets. The key is to understand how global markets are all connected.
For instance, the strength or weakness of "commodity currencies" like the Australian Dollar (AUD), New Zealand Dollar (NZD), and Canadian Dollar (CAD) can give you clues about raw materials. A really strong AUD might go hand-in-hand with rising iron ore or copper prices. A weak CAD could reflect falling oil prices.
Likewise, the US Dollar's strength has a famous inverse relationship with assets priced in USD, like gold. A surging USD often pushes gold prices down, and vice versa. It should never be your main signal for trading stocks or commodities, but using a currency strength meter for extra context can certainly add another layer of confirmation to your analysis.
Ready to stop guessing and start trading with a clear, data-driven edge? The Colibri Trader programs are designed to teach you a straightforward, price-action based approach that profits in any market. Learn the disciplined strategies that build confidence and deliver consistent results. Discover your trading potential with Colibri Trader today.